
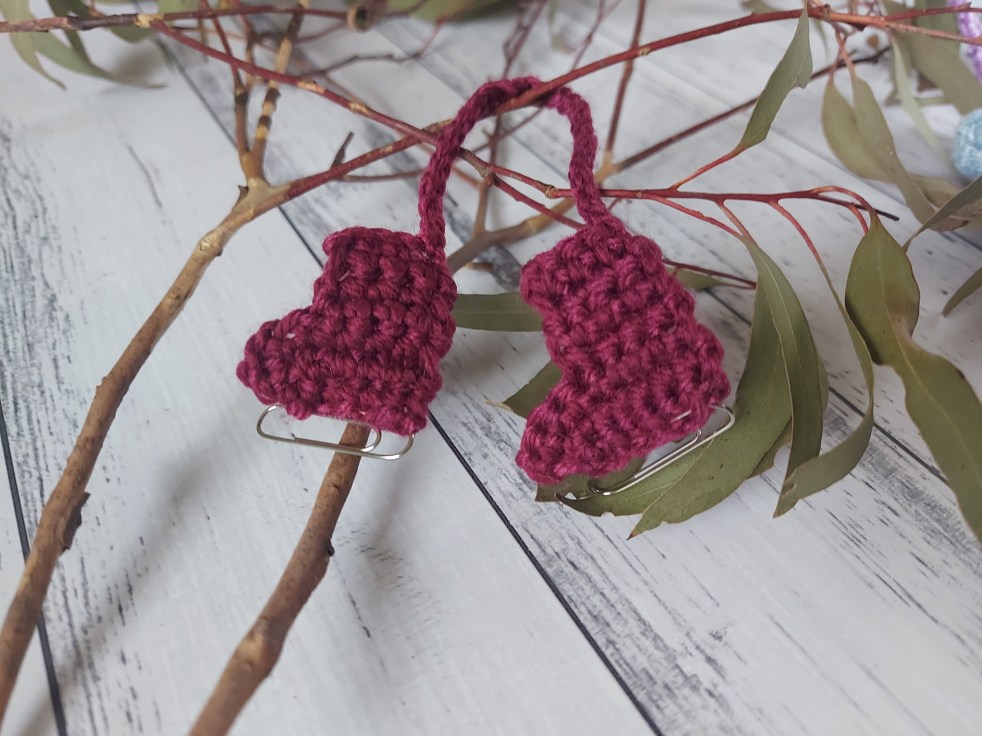
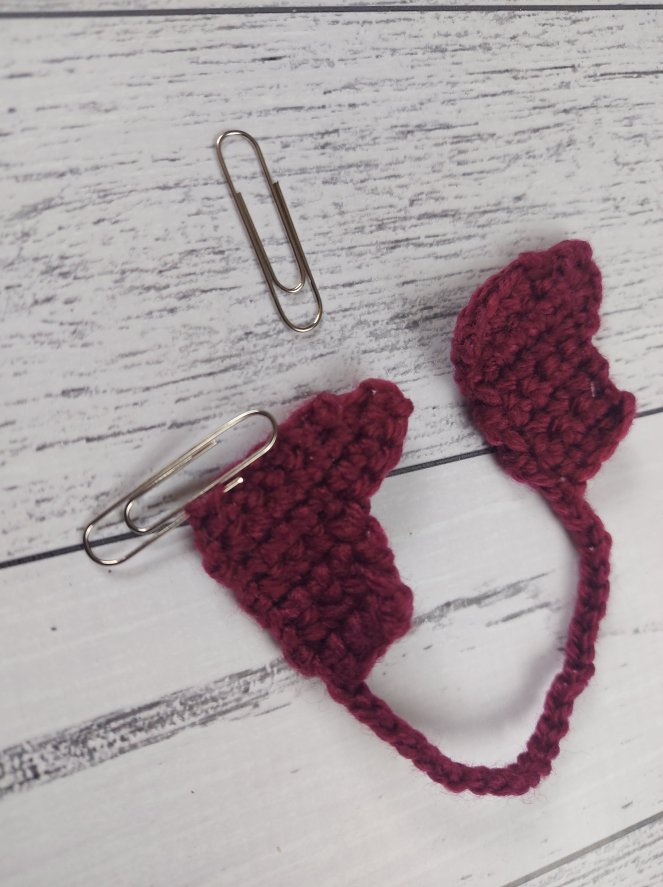
These quick and cute little Christmas decorations are part of my stash busting advent calendar. This pattern is designed to work up in less then 15 minutes and use up those pesky ball remnants from this year. There are two variations of these skates, the quick, beginner level 15 minute version. There is a second 30 minute version in a rag-doll style. This pattern is designed to work with DK weight yarn, but can be made with any yarn with a matching hook. The stash-busting advent calendar will be released late November! If you make these please use the social media tags #craftycommuterdesigns and #15minuteskates to share your creations!

What you need
15 Minute Skates
- 10-15m DK weight yarn
- 2x 33mm paperclips
- Stitch Marker
- 3mm hook
- yarn needle
30 Minute Skates
- 25-30m DK weight yarn
- 2x 33mm paperclips
- Stitch Marker
- 3mm hook
- yarn needle
- poly-fill, small amount
Stitches Used
- DEC: SC[DC] decrease over two stitches.
- SC: single crochet (US term) [UK double crochet]
- SL: Slip Stitch
- CH: Chain
15 Minute Skates
US Terminology
R1: CH7, 2SC in 2nd from hook 2SC, SC in next 5 stitches. CH1 and turn. [7 st]
R2: SC in first 6 stitches, 2SC in last stitch. CH1 and turn. [8 st]
R3: SC across. CH1 and turn. [8]
R4: SC in first 3 stitches, DEC. CH1 and turn. Leave remaining stitches unworked.[4 st]
R5-R6: SC across. CH1 and turn. [4 st]
R7: SC across. [4 st]
The first boot is done.
R8: CH25 This can be made longer or shorter if desired. This is the linking chain between the two boots. CH5.
UK Terminology
R1: CH7, 2SC in 2nd from hook 2DC, DC in next 5 stitches. CH1 and turn. [7 st]
R2: DC in first 6 stitches, 2DC in last stitch. CH1 and turn. [8 st]
R3: DC across. CH1 and turn. [8]
R4: DC in first 3 stitches, DEC. CH1 and turn. Leave remaining stitches unworked.[4 st]
R5-R6: DC across. CH1 and turn. [4 st]
R7: DC across. [4 st]
The first boot is done.
R8: CH25 This can be made longer or shorter if desired. This is the linking chain between the two boots. CH5.
R9:CH5. In 2nd from hook SC, SC in next 3 stitches. CH1 and turn. [4 st]
R10-11: SC across. CH1 and turn. [4 st]
R12: 3SC, 2SC in same stitch. CH4 and. turn. [5SC, 4 CH]
R13: In 2nd (and 3rd) CH from hook DEC, SC in each stitch across. CH1 and turn. [7]
R14: SC across until last 2 stitches, DEC. CH1 and turn. [6]
R15: DEC, SC across. Fasten off and weave in ends.[5]
R9:CH5. In 2nd from hook DC, DC in next 3 stitches. CH1 and turn. [4 st]
R10-11: DC across. CH1 and turn. [4 st]
R12: 3DC, 2DC in same stitch. CH4 and. turn. [5DC, 4 CH]
R13: In 2nd (and 3rd) CH from hook DEC, DC in each stitch across. CH1 and turn. [7]
R14: DC across until last 2 stitches, DEC. CH1 and turn. [6]
R15: DEC, DC across. Fasten off and weave in ends.[5]
Assembly:
Thread the paperclip through the base chain of each boot.
30 Minute Skates
US Terminology
Boot: Make 4
R1: CH7, in 2nd from hook 2SC, SC in next 5 stitches. CH1 and turn. [7]
R2: SC in first 6 stitches, 2SC in last stitch. CH1 and turn. [8]
R3: SC across. CH1 and turn. [8]
R4: SC in first 3 stitches, DEC. CH1 and turn. Leave remaining stitches unworked.[4]
R5-R6: SC across. CH1 and turn. [8]
R7: SC across. [8]
Fasten off and sew in ends.
UK Terminology
Boot: Make 4
R1: CH7, in 2nd from hook 2DC, DC in next 5 stitches. CH1 and turn. [7]
R2: DC in first 6 stitches, 2DC in last stitch. CH1 and turn. [8]
R3: DC across. CH1 and turn. [8]
R4: DC in first 3 stitches, DEC. CH1 and turn. Leave remaining stitches unworked.[4]
R5-R6: DC across. CH1 and turn. [8]
R7: DC across. [8]
Fasten off and sew in ends.
Assemble Boots:
- You will need two boot halves for this part. Take 2 boots and pPlace wrong sides together. I find pinning with stitch markers to be helpful. For this step you will be working through two pieces.
- SL into last stitch of R7. CH1. SC[DC] in each stitch around in each 90 degree corner, make 3 SC[DC]. Lightly stuff as you go . SL into the first SC[DC] . Fasten off and weave in ends.
- Repeat Steps 1 and 2 for the second boot, but do not fasten off. CH25 you can increase or decrease this as desired. The longer it is the more the boots will dangle. SL into the corner stitch of the other boot (from step 2). Fasten off and weave in ends.
- Taking the paper clip, slightly bend open. Weave the open end from the heel of the boot towards the foot. Bend back into shape. You are done.
Terms of use:
Free patterns found on this site can be used to make finished items for the following purposes:
- For personal use
- As gifts for friends/family
- For charity donations
- For sale online
- For sale at craft fairs, outdoor markets, etc.
When using the free patterns found on this site, please be aware of the following:
- You are allowed sell finished items from the patterns found here. However, you may NOT, under any circumstances, use the photos found on this site for selling your items. If you are going to sell online, you should make your own items and photograph them to represent your own work.
- You may NOT copy and paste the pattern onto your own blog, Facebook, or anywhere else. If you would like to share a pattern, simply share the link to the page instead. You are welcome to copy and paste a pattern into a document for printing or saving for personal use only.
- You may NOT use the free patterns found on this site as teaching material and/or for online classes without expressed written consent from the designer/owner of this page.
- You may NOT use the free patterns found on this site to create video tutorials on YouTube or any other video platform, site, or blog.
- You may NOT post a translation of the patterns found on this site anywhere without expressed written consent from the designer/owner of this page.
- You may NOT create PDFs of the patterns found on this site, altered or in its original form, for intent to distribute to others or post on illegal pattern sharing sites. The revenue earned by ad traffic to this site is what allows for free patterns to be written and published. Without people visiting this site to view the patterns, there will be no traffic which means, no more free patterns.
- You may NOT copy any of the free patterns on this site, in part or as a whole, and claim them as your own pattern.
- You may NOT resell the free patterns found on this site, altered or in its original form.
If you have any questions regarding the terms of use of this page, please contact the designer/site owner.
