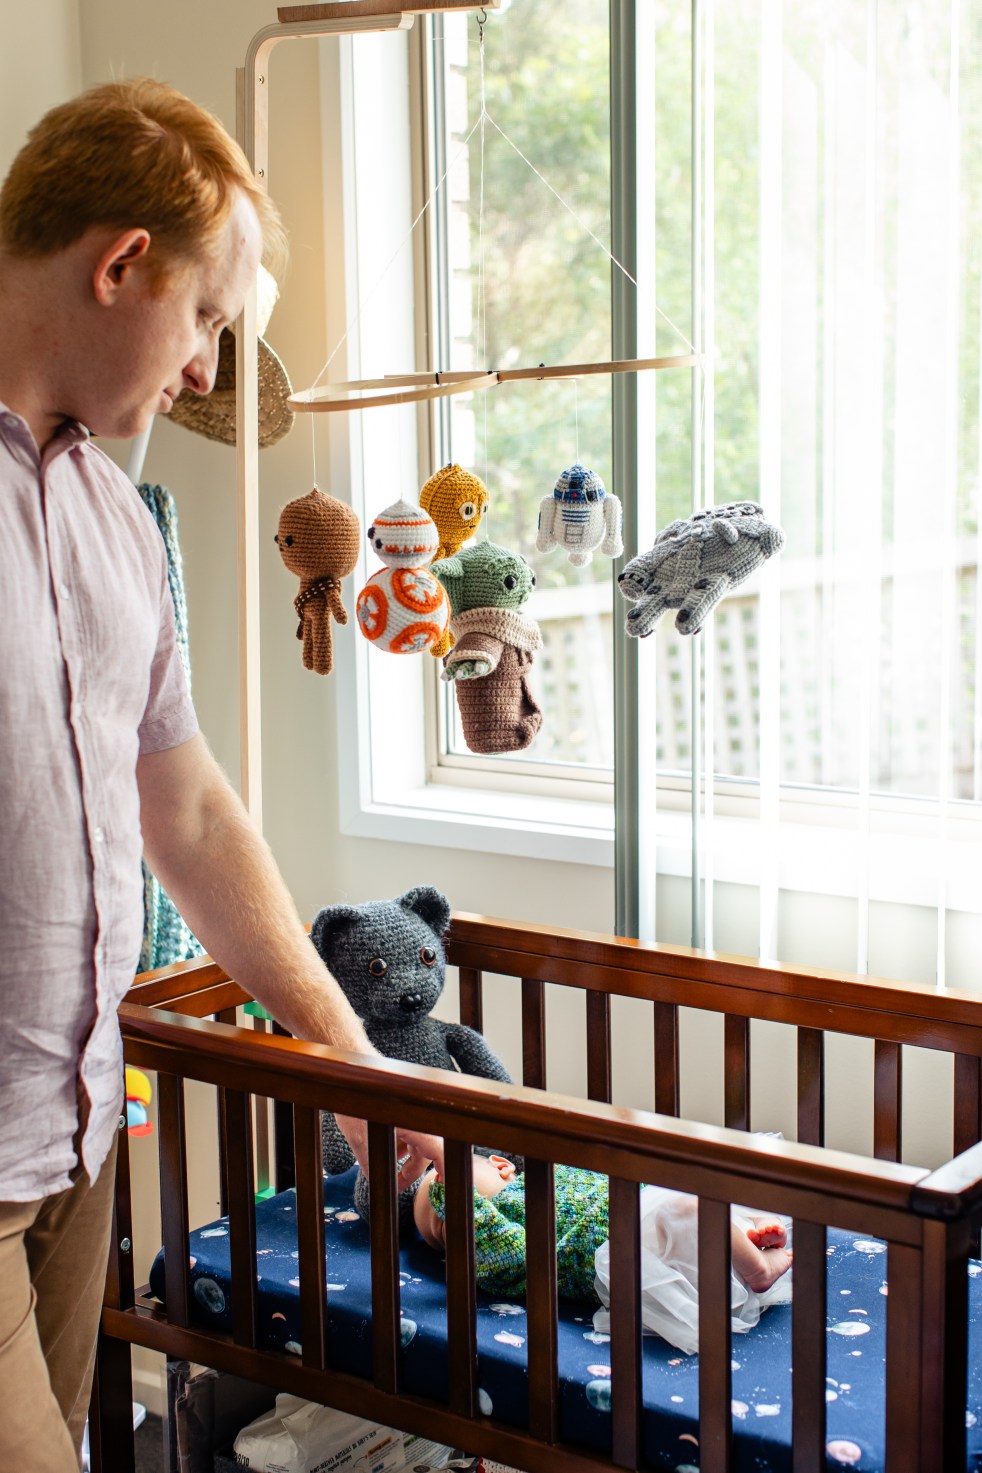

When we found out we were expecting our first child, we made a deal (after much debate): my husband would make a teddy, and I would crochet a mobile based on a theme of his choosing. That agreement was quickly modified when I was banned from making a teddy…. because, in his words, “she can’t have one better than mine.”
My husband’s desire to make our baby her very first teddy was incredibly sweet. While he’s not a crocheter or knitter, he has a fearless approach to crafting – choosing to “wing it” without counting stitches or following patterns. Despite this (or maybe because of it), the final teddy turned out impressively well.
Since we chose to wait until our daughter’s birth to find out her gender, the mobile needed to be gender-neutral. Unsurprisingly, we kept circling back to my husband’s one true fandom: Star Wars. We finally settled on a Light Side theme, featuring R2D2, BB8, C3PO, Chewbacca, and the Millennium Falcon. And of course, the centrepiece had to be Yoda (well, technically Grogu), because what Star Wars mobile would be complete without him?
In this post, I’ll share the patterns I used (where I remember them – it was a great stash-busting project!), the yarns involved, and how we assembled everything into a finished mobile.
Now, 18 months on, I can safely say our daughter loved her mobile. Unsurprisingly, she developed a particular affection for Grogu—one of her very first words. The mobile has since been retired, with the figures now part of her growing collection of Star Wars toys to carry on the legacy.
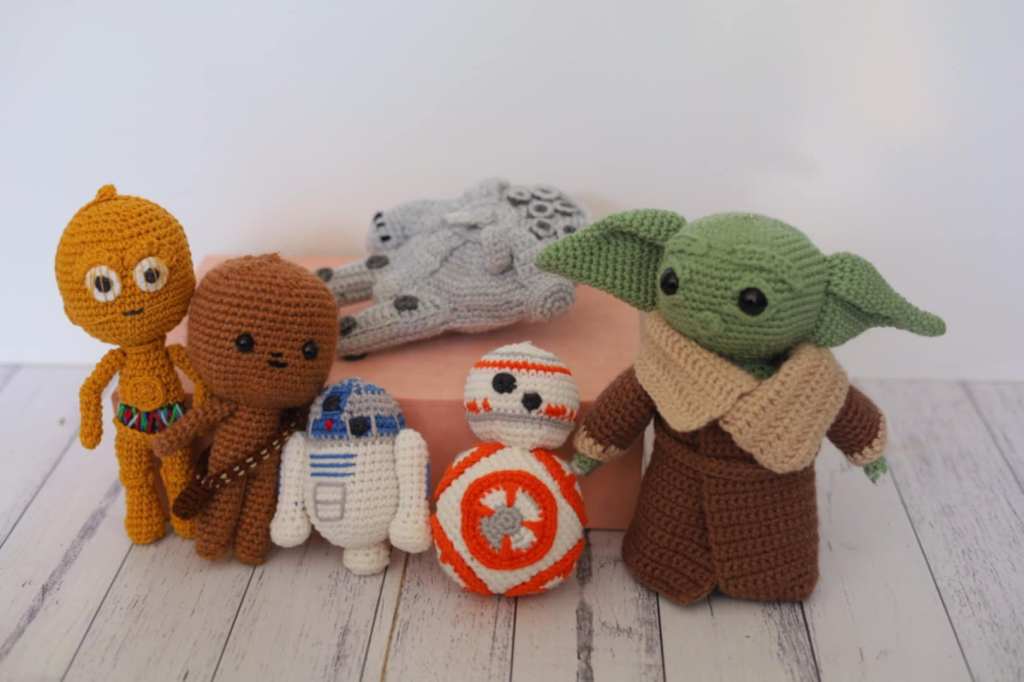
The Patterns
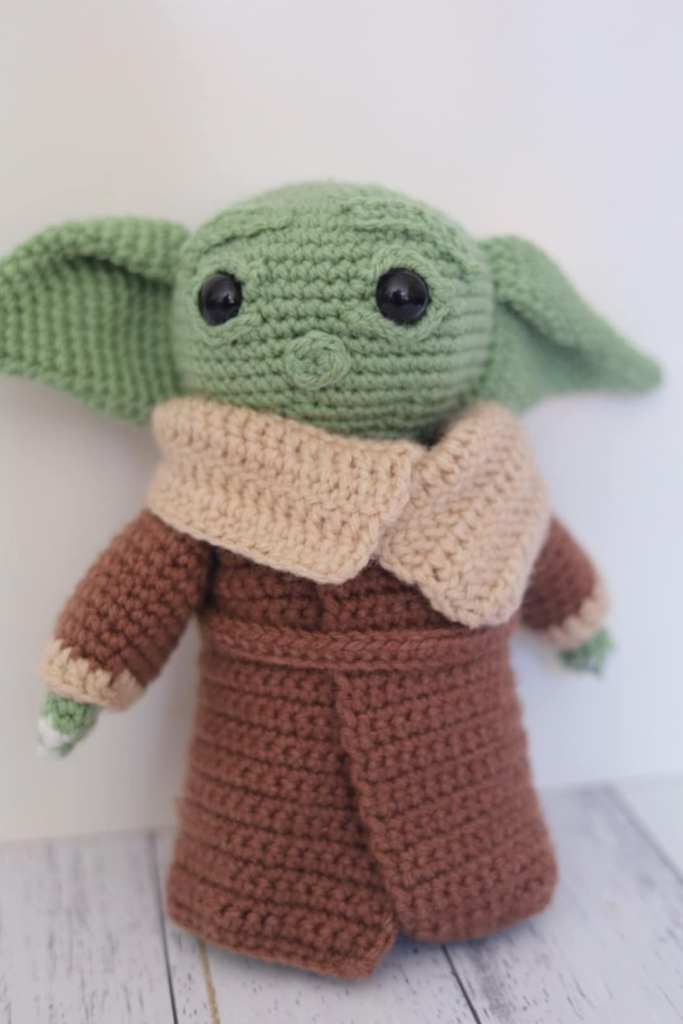
- Yoda
- C3P0
- R2D2
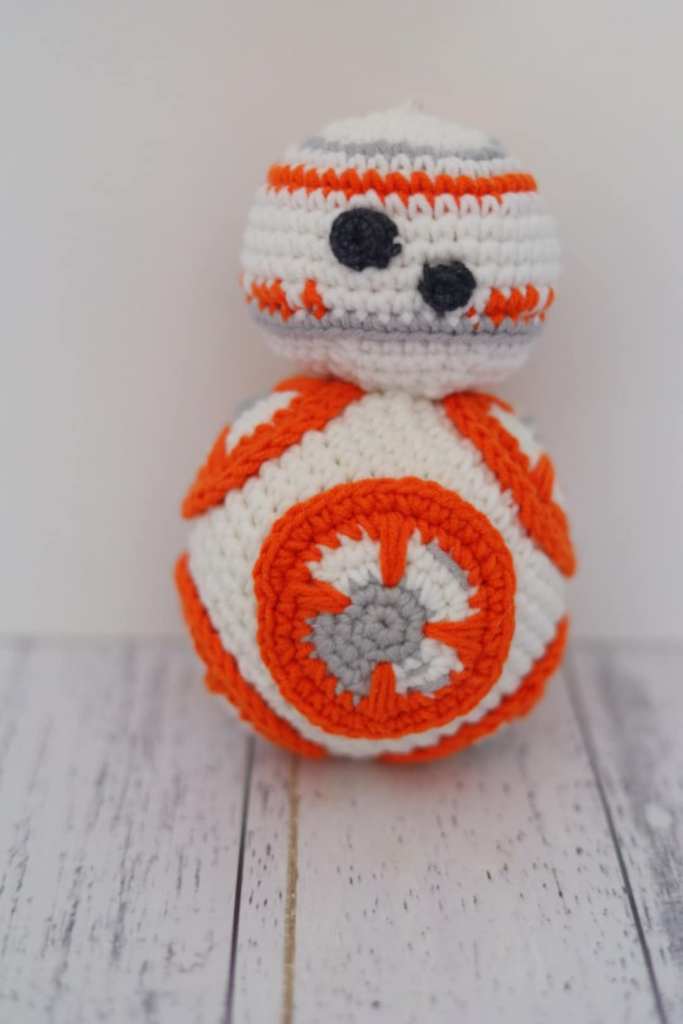
- BB8
- Chewbacca
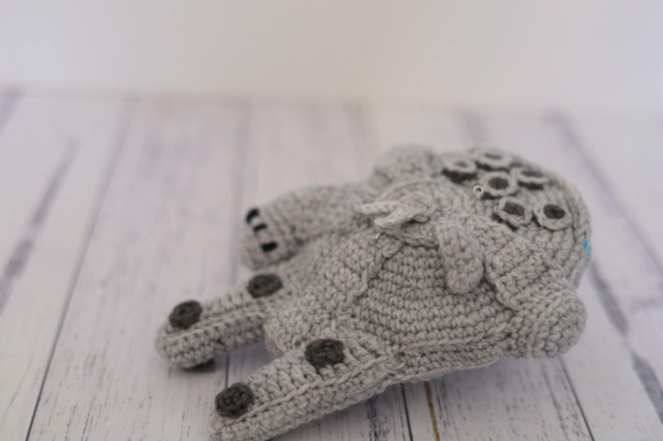
- Millenium Falcon

Yoda/Grogu
This was made from my stash, DK (8ply) weight yarn that was left over from previous projects.
The pattern I used is here: https://www.1upcrochet.com/www1upcrochetcom/old-patterns//2019/12/baby-yoda-inspired-amigurumi-pattern.html
Unfortunatley it would appear that the site is not functional anymore, the closest match I have is here: https://www.ravelry.com/patterns/library/the-child-amigurumi-baby-yoda-grogu
C3P0
I used Yarn Art Jeans Cotton. Colours 84 (I , think), 17, 52, 90, and 1.


R2D2
I used Yarn Art Jeans Cotton. Colours 53, 17 and 1 and some 4 ply grey and red cotton from my stash. You can find information on the yarn here (https://yarnart.info/en/jeans/) [I dont get anything if you click this link, I just love using this for Amigurumi]
I did change 1 or 2 things, I replaced the saftey eyes to black yarn circles [6SC into a magic ring, SL to close] to make the figures toddler safe once we were into the next stage of parenting.
BB8
I used Yarn Art Jeans Cotton. Colours 77, 53 and 1 and some 4 ply grey and red cotton from my stash.
I loved this pattern for its simplicity, however again I swapped saftey eyes for sewen on black rounds. I used a circle with 8 and 6 SC in a magic ring.


Chewbacca
This was made from my stash, DK (8ply) weight yarn that was left over from previous projects.
Millenium Falcon
This was made from my stash, DK (8ply) weight yarn that was left over from previous projects.
Constuction
Once all the figurines were completed, assembly was fairly straightforward. There are plenty of ways you could approach this, including buying a ready-made mobile frame. However, being two engineers, we opted to make ours from scratch using what we had on hand.
- 3 x 20cm bamboo hoops
- 3 x cable ties
- 7 x small jewellery loops
- 1 x fishing line swivel
- Fishing wire
We also had a mobile arm from a previous baby gift. If you don’t have one, they’re easy to find online or in baby stores.
Step-by-step assembly:
- Build the base structure: Use the cable ties to connect the three hoops in a triangular configuration. This forms the mobile’s frame.
- Attach suspension lines: Tie one end of a 50cm length of fishing wire to the far end of each hoop (three total). Bring the other ends together and secure them to a fishing line swivel. Adjust the length to suit your mobile arm and desired figure height. (You can wait until after step 7 to finalize lengths.)
- Prepare the figurines: Insert a small jewellery loop into each figure. If this is hard to acheive with your selected yarn, you can sew these in. For the Millennium Falcon, attach two loops—one at the front and one at the back for better balance.
- Attach fishing wire to the figures: Tie a 50cm length of fishing wire to each jewellery loop using a fishing knot (or figure-eight knot), and trim any excess.
- Special case – Millennium Falcon: Tie one fishing line to each loop. Join both lines together to support the ship in a stable “flying” position. Trim so only one line remains for hanging.
- Position the figures: Attach each figure to the hoop structure. We wrapped the fishing line around the hoops in a criss-cross pattern to balance the distribution. This step took us a surprisingly long time to get just right!
- Final assembly: Hang the structure from the swivel. This allows it to rotate freely regardless of your mobile arm’s design. If your mobile arm can’t connect directly to the swivel, just add a loop of fishing wire on the other end for attachment.
Let me know if you’d like a printable version or accompanying images/diagrams for the assembly!