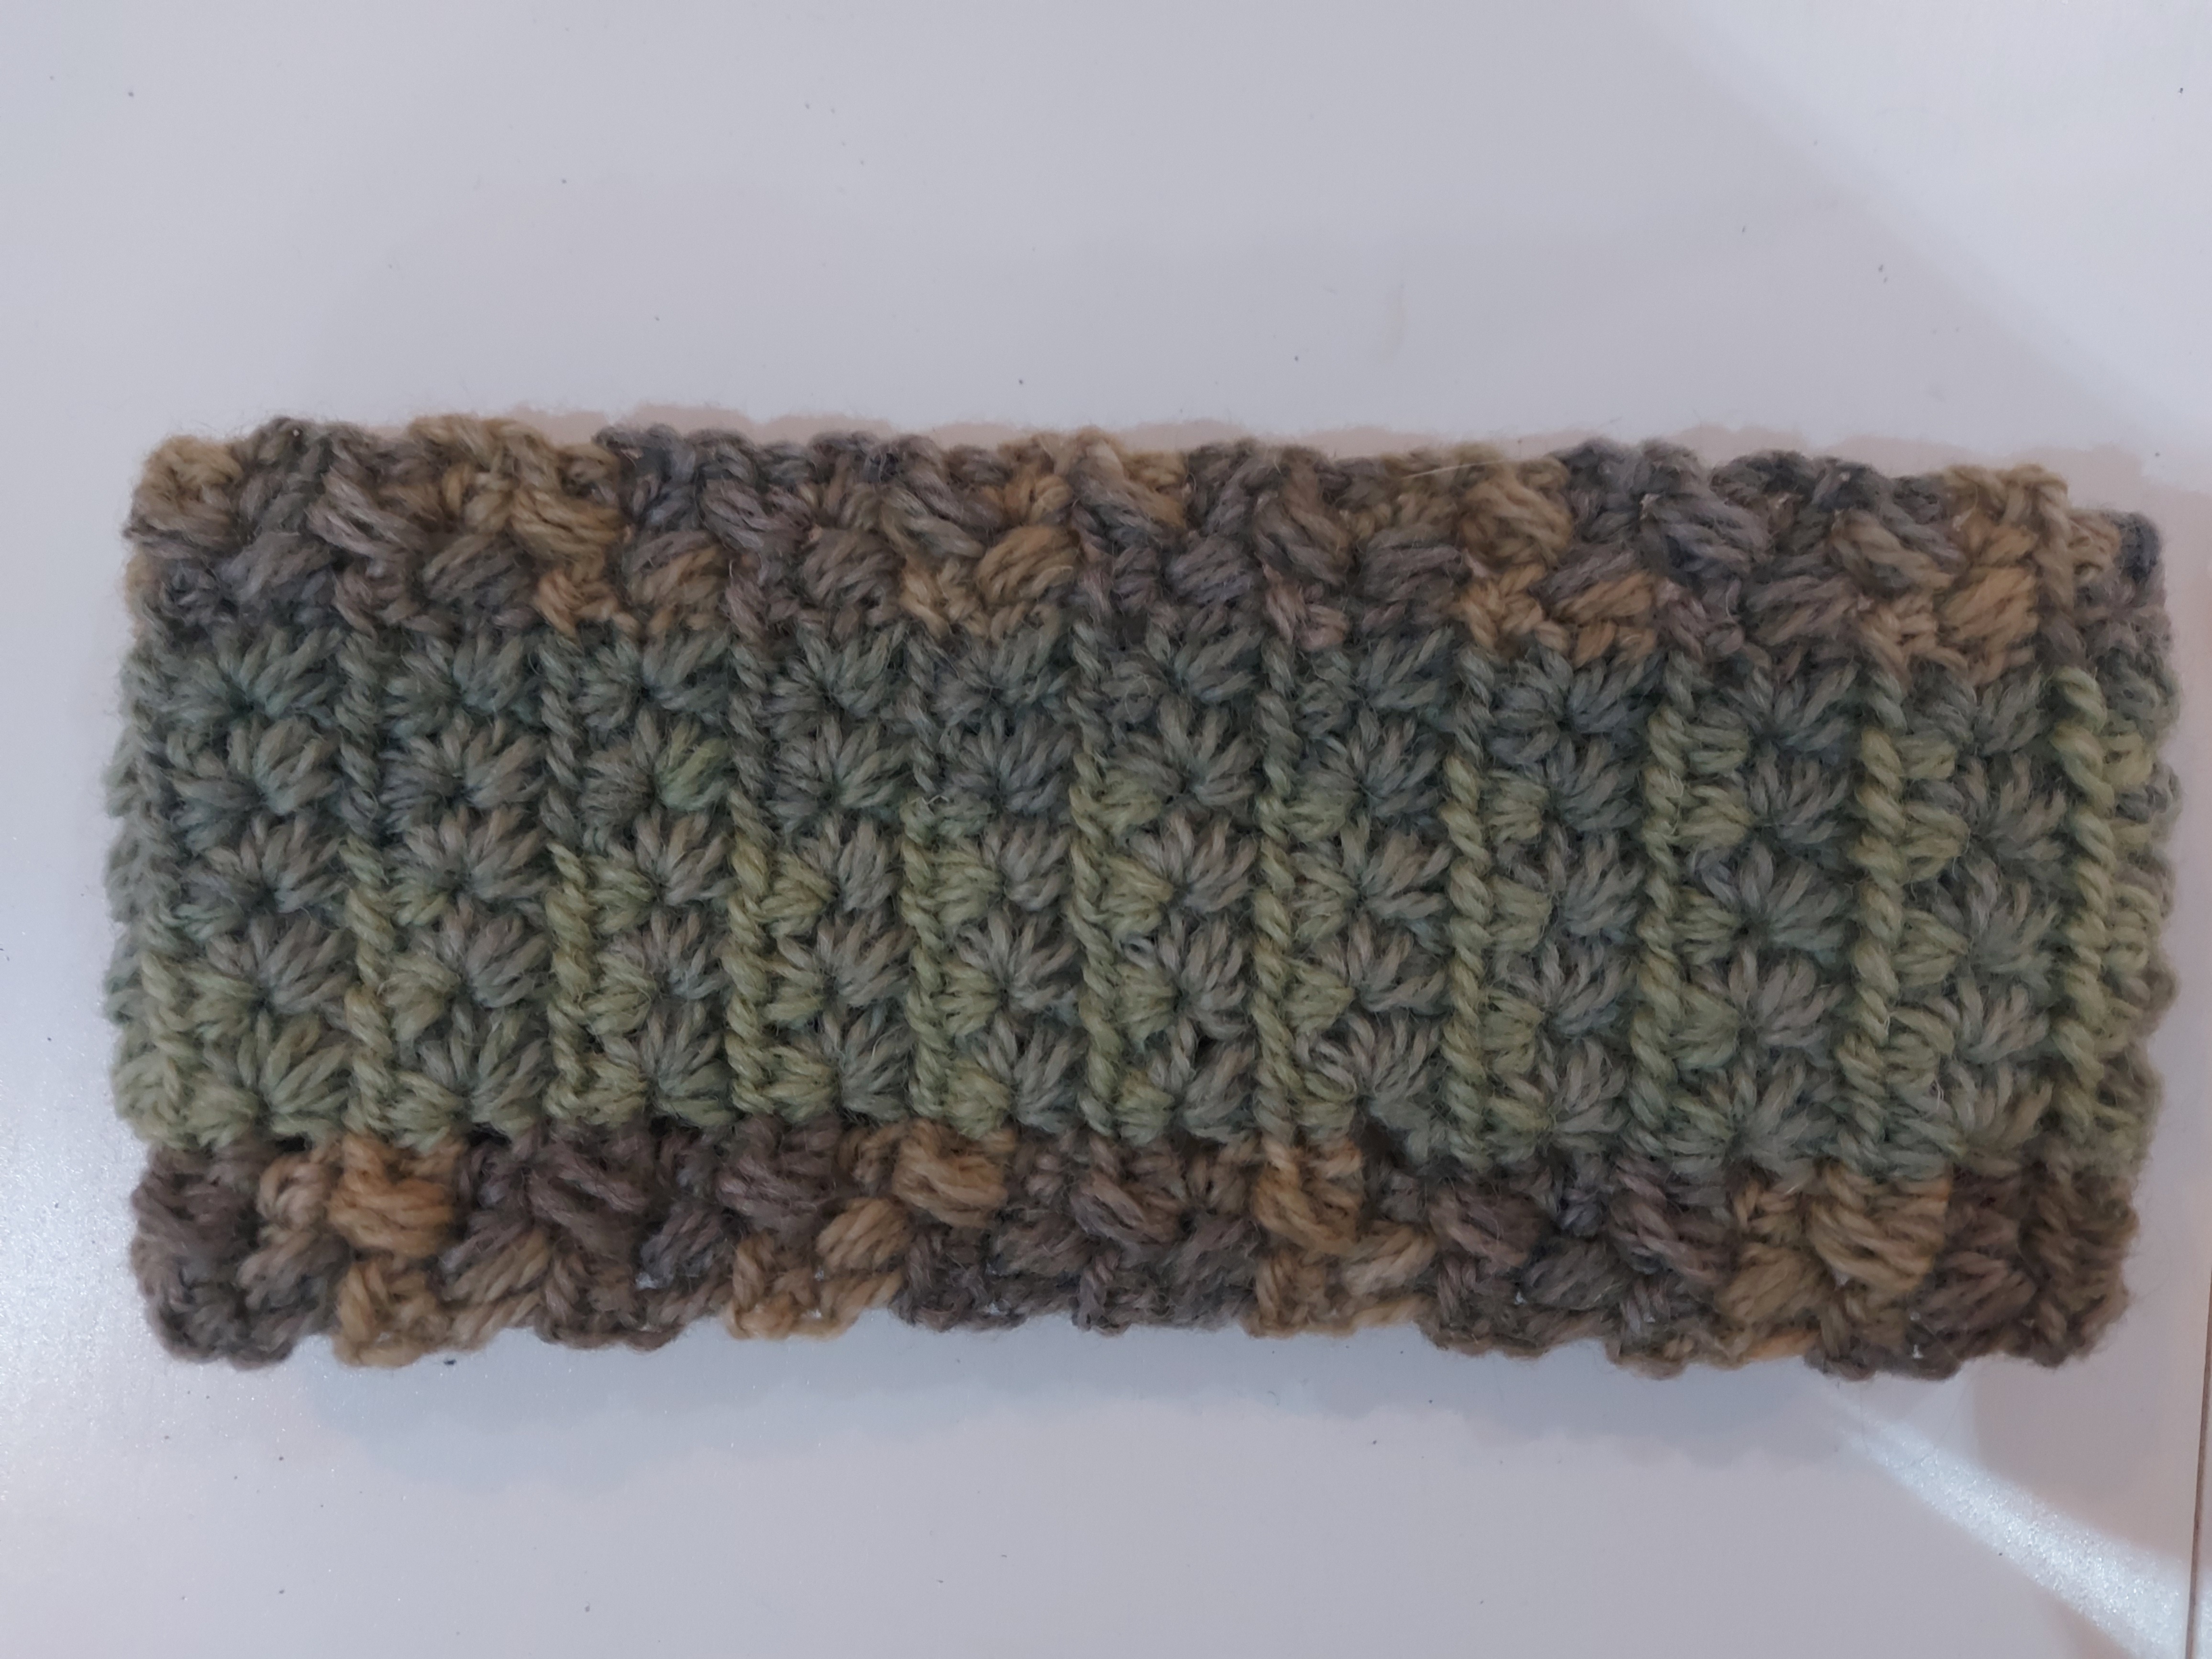
This pattern is the last in the stargazing series. The combination of star stitch and (coffee) beans is the perfect combination for stargazing on cold winter nights. This scarf is the perfect way to keep warm. An Ad-free PDF of the pattern is available in my Raverly Store. This pattern is only for the one colour version, however the PDF provides scaling instructions, Photo tutorial of difficult steps and two required adjustments for a two-colour scarf.

Stitches
- CH: Chain
- SL: Slip Stitch
- SC: Single Crochet
- HDC: Half double crochet
- Bean stitch: Insert hook into stitch, yarn over and pull loop through. Yarn over, insert hook into same stitch, yarn over and pull loop through. Yarn over, insert hook into same stitch, yarn over and pull loop through. Yarn over and pull through all loops on hook. CH1.
- First Star: To start a row, chain 3. Insert hook into 2nd chain from hook , yarn over and pull through, insert hook into third from hook yarn over and pull through, insert into the base stitch of the chain, yarn over and pull through. In the next stitch insert hook, yarn over and pull through, you will not have 5 loops on the hook. Insert into the next stitch, yarn over and pull through. Yarn over and pull through all loops on the hook. CH1.
- Remainder of Star Row: insert hook into the chain space, yarn over and pull through, insert hook into the last loop of previous star, yarn over and pull through, insert into base of previous star, yarn over and pull through, In the first stitch along insert hook, yarn over and pull through, you will not have 5 loops on the hook. Insert into next stitch, yarn over and pull through. Yarn over and pull through all loops on the hook. CH1.If you are not familiar with star stitch follow tutorial steps 12 and 13.
Bean Stitch Tutorial
Star Stitch Tutorial
What you need:
- 620-640m Yarn weight 4/Worsted, Either one colour or split between two.
- Yarn Needle
- 5mm hook, or hook to match gauge.
If the star and bean stitch rows are curling you may be working the Try changing up a hook size by 0.5-1mm. - Gauge:My 10 SC stitches by 10 rows has measured 8cm wide and 7.5 cm tall. Remember that you need some stretch in the band.
Sizing:
The scarf measures approximately 60″ and 5 ¾” wide.To make the scarf longer add more stitches to the foundation chain in multiples of two. To make the scarf shorter remove multiples of 2 stitches from the foundation stitch.
Pattern
Foundation: CH202
R1:HDC in 3rd Chain from the hook, HDC across. CH1 and turn. [200HDC] RS
R2: Working in the back loop (3rd loop) of the HDC across, SC in each stitch. Turn. [200 SC]
R3: This row is star stitch. Follow the instructions in the stitches section. Star across. CH1 and turn. [100 stars]
R4:In the eye of each star (CH1) 2 HDC in each stitch across. CH1 and turn. [200HDC]
R5:HDC in each stitch across. CH1 and turn. [200HDC]
R6:Working in the 3rd loop of the HDC across, SC in each stitch. Turn. [200 SC]
R7: *Bean, SK* repeat across. CH1 and turn.[100 Beans]
R8: *Bean, SK* repeat across. CH1 and turn.[100 Beans]
R9: HDC in each stitch across. CH1 and turn. [200 stitches]
R10: Working in the 3rd loop of the HDC across, SC in each stitch. Turn. [200 SC]
R11: This row is star stitch. Follow the instructions in the stitches section. Star across. CH1 and turn. [100 stars]
R12:In the eye of each star (CH1) 2 HDC in each stitch across. CH1 and turn. [200HDC]
R13: HDC in each stitch across. CH1 and turn. [200 stitches]
R14: Working in the 3rd loop of the HDC across, SC in each stitch. Turn. [200 SC]
Border: SC in each stitch around the cowl. Place 2 SC in each corner.SL into the first SC. Fasten off and weave in ends.
Remember to show me your projects on Facebook (The Crafty Commuter) and Instagram @crafty_commuter or put your project on Raverly (Crafty Commuter). Use the hashtag #stargazingscarf and #stargazingCAL . If you enjoyed the pattern I ask that you consider purchasing the PDF.


Terms of use:
Free patterns found on this site can be used to make finished items for the following purposes:
- For personal use
- As gifts for friends/family
- For charity donations
- For sale online
- For sale at craft fairs, outdoor markets, etc.
When using the free patterns found on this site, please be aware of the following:
- You are allowed sell finished items from the patterns found here. However, you may NOT, under any circumstances, use the photos found on this site for selling your items. If you are going to sell online, you should make your own items and photograph them to represent your own work.
- You may NOT copy and paste the pattern onto your own blog, Facebook, or anywhere else. If you would like to share a pattern, simply share the link to the page instead. You are welcome to copy and paste a pattern into a document for printing or saving for personal use only.
- You may NOT use the free patterns found on this site as teaching material and/or for online classes without expressed written consent from the designer/owner of this page.
- You may NOT use the free patterns found on this site to create video tutorials on YouTube or any other video platform, site, or blog.
- You may NOT post a translation of the patterns found on this site anywhere without expressed written consent from the designer/owner of this page.
- You may NOT create PDFs of the patterns found on this site, altered or in its original form, for intent to distribute to others or post on illegal pattern sharing sites. The revenue earned by ad traffic to this site is what allows for free patterns to be written and published. Without people visiting this site to view the patterns, there will be no traffic which means, no more free patterns.
- You may NOT copy any of the free patterns on this site, in part or as a whole, and claim them as your own pattern.
- You may NOT resell the free patterns found on this site, altered or in its original form.
If you have any questions regarding the terms of use of this page, please contact the designer/site owner.
