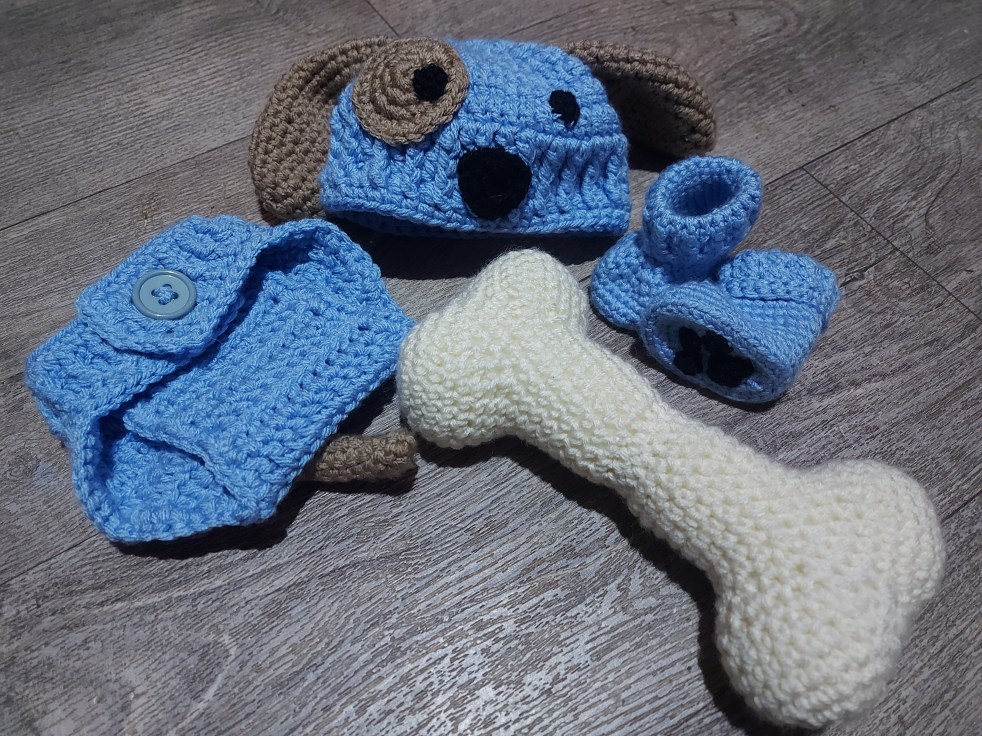
When one the local animal foster groups announced they were expecting their first child, a baby boy, I knew exactly what I needed to make. This little bub will be joining a family of three dogs and a cat. What could be a more adorable outfit for the little man then a puppy.

I based this set on a few patterns from others. I have the links below so that you can make your own. I based the beanie , nappy cover and booties on the Parker set by sewrella. The set on its own is absolutley stunning. The dog bone snuggle toy is a shorter version of the pattern by Sunflowers at Home.

I made the patterns for embelisments myself and have added these below. All the paid patterns I could find didnt match the set I loved or were too comical. I wanted the booties and nappy cover to be subtle, and I made an extra hat. This way there was an option to dress the baby up or have a normal set.
This pattern is written in US terminology and you will need to be familiar with Single Crochet [SC], Half Double Crochet [HDC], Slip Stitch [SL] and single crochet increase [INC].
Material:
- Button for the tail
- Contrast colour yarn in same weight as your beanie and bootie set.
- hook to mach yarn. I used 10ply with a 5mm hook.
- Small ammount of stuffing
- For the bootie paw prints : 8 or 4 ply black yarn, 3mm hook (the booites are small and you need a lot of detail in the paw print.
Ears:
Make two
R1: in a magic circle make SC4. Pull tight, do not join.
R2: INC in each stitch [8SC]
R3: *INC, SC* around [12 SC]
R4: *INC SC, SC* around [16 SC]
R5: SC around [16 SC]
R6: *INC SC, SC, SC* around [20 SC]
R7-8: SC around [20 SC]
R9: *INC, SC, SC, SC, SC* repeat around [24 SC]
R10-13: SC around, SL into the next stitch, leave around 20cm tail [24SC]
Note: If you want a longer ear add a few more SC rounds after R13.
Assembly:
Flatten the ear, use the tail to sew the opening together. You should now have 12 stitches across. Pinch the middle 6 together so that the ear makes a “T” Shape. So the middle 3 stitches on either side are 90 degrees from the rest of the ear. Sew these together to
Sew these to the third row from the top of the beanie.
Nose:
make one
R1: In a magic ring 6SC, pull loop tight.
R2: 2SC in next stich, (HDC, DC, HDC) in next stitch. repeat around. SL into first stitch. leave long tail to sew in.
Assembly: Sew onto beanie evenly inbetween the eyes.
Eye patch:
Make one
R1: in a magic circle make SC6. Pull tight, do not join.
R2: INC in each stitch [12 SC]
R3: *INC, SC* around, SL into the first SC leave a tail for sewing on. [18 SC]
Assembly: Sew to the hat where you would like the eye to be.
Eye:
Make 2, or you can use buttons.
R1: in a magic circle make SC6. Pull tight, leave a tail sew on.
Sew Eyes onto the hat.

Tail:
You will need a button for the tail. if you wish to make the tail removable.
The tail is worked in a spiral. the rounds are not joined.
R1: in a magic circle make SC6. Pull tight, do not join.
R2-4: SC around
R2: INC, SC, SC,SC,SC,SC [7SC]
R6-8: SC around
R9: INC, SC, SC, SC, SC, SC,SC,SC [8 SC]
R10: SC around.
Assembly:
Lightly stuff the tail so that it holds a curl shape from the INC stitches. You can also use a pipecleaner to hold a shape. Sew the ends closed and use knots to create a button loop. Sew button onto diaper cover where you want the tail to sit.

Paw Prints:
You will need a lighter weight yarn and a small hook. I used DK weight and a 3mm hook for this.
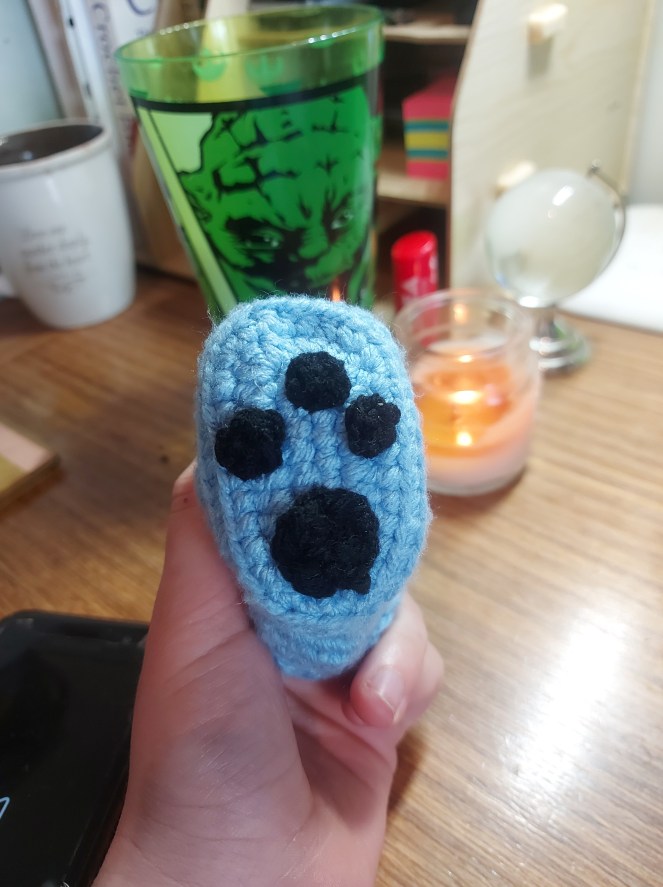
Toe Pads:
You will need three per paw.
R1: In a Magic ring SC 4 SL into first SC. Fasten off and leave a long tail to sew into the bootie.
Main Pad:
We are going to use a cute little heart for this.
R1: In a magic ring, CH1 3HDC, 2SC, HDC, 2SC, 3HDC, CH1, SL into the ring. Pull tight and leave a long tail to sew into the bootie.
Sew into the base of the bootie with the point of the heart facing the toes. Sew the three dots evenly arount the point to resemble the paw print.
Terms of use:
Free patterns found on this site can be used to make finished items for the following purposes:
- For personal use
- As gifts for friends/family
- For charity donations
- For sale online
- For sale at craft fairs, outdoor markets, etc.
When using the free patterns found on this site, please be aware of the following:
- You are allowed sell finished items from the patterns found here. However, you may NOT, under any circumstances, use the photos found on this site for selling your items. If you are going to sell online, you should make your own items and photograph them to represent your own work.
- You may NOT copy and paste the pattern onto your own blog, Facebook, or anywhere else. If you would like to share a pattern, simply share the link to the page instead. You are welcome to copy and paste a pattern into a document for printing or saving for personal use only.
- You may NOT use the free patterns found on this site as teaching material and/or for online classes without expressed written consent from the designer/owner of this page.
- You may NOT use the free patterns found on this site to create video tutorials on YouTube or any other video platform, site, or blog.
- You may NOT post a translation of the patterns found on this site anywhere without expressed written consent from the designer/owner of this page.
- You may NOT create PDFs of the patterns found on this site, altered or in its original form, for intent to distribute to others or post on illegal pattern sharing sites. The revenue earned by ad traffic to this site is what allows for free patterns to be written and published. Without people visiting this site to view the patterns, there will be no traffic which means, no more free patterns.
- You may NOT copy any of the free patterns on this site, in part or as a whole, and claim them as your own pattern.
- You may NOT resell the free patterns found on this site, altered or in its original form.
If you have any questions regarding the terms of use of this page, please contact the designer/site owner.
