
Every one learns how to make a granny square when they begin to crochet. For Granny Square day, I wanted to create an alternate project to the granny square blanket. Having an “on the go” crochet organiser pouch is essential for those crocheting on the go. This is something I learnt rather quickly as I crochet on my daily commute to work.
In this tutorial I will go through the steps to turn any granny square measuring approximately 10” by 10” into a notions pouch. I have also provided some scaling instructions for larger and smaller squares, but I do not recommend going much smaller then 9” as the pouch will become very small. You can always add extra layers to any granny squares by adding extra stitches into the corners. The finished pouch measures approximately 10″ by 4″.

I used a traditional granny square for this pattern, but any square will work. For some inspiration take a look at my top list of Granny Squares! There are plenty of patterns to pull inspiration from here. Do not fear, if you are new to crochet, I have also provided a chart and written instructions for a standard granny square.
This instruction set is available on my Ravelry store. as an ad-free printable PDF or you can purchase through the paypal link below. I would recommend Ravlery I am running a promotion util the end of September (2020) where any pattern purchase will come with a $5AUD discount for my etsy store.
For immediate download please use Ravelry, or purchase through this link, It may take a little while for the PDF using paypal but I will send the pattern as soon as I can, please be patient with me 🙂
Granny Square Bag PDF Pattern
This pattern book provides a photo tutorial for each of these patterns Ad-free. The file is PDF. This pattern is rated as EASY -- suitable for a confident beginner. It uses standard US and UK English crochet terminology. It has been tested for clarity and accuracy. In addition, and as mentioned earlier, it contains how-to photos. I am confident this pattern will make for a happy crochet experience. I don't accept returns, exchanges or cancellations. But please contact me if you have any problems with your order. Please note, it may take a few hours to reveive the pattern this way as I need to confirm your paymebt before it is sent out. I endevour to send you the pattern as soon as possible though.
A$1.50
What you will need
The Pouch
- Granny Square 10”x10” (25cmx25cm)
- 25cmx25cm square of material, I suggest a cotton blend
- Button, approximatley 30mm diameter
- 1m yarn for loop
- Thread for hemming and stitching cotton to square
- Vegan Suede or leather patch (Optional) (25mmx15mm)
Granny Square
- DK weight yarn (25meters approximatley)
I used Makr Ombre minis tube - 3.5mm hook
- Yarn needle
- Scissors
Stitches:
In US terminology (UK Terminology)
- DC (TC) Double Crochet (Treble Crochet)
- CH Chain
- SL Slip Stitch
The Chart
Note this chart is showing the definitions for US terminology.

The chart is not mine, I have embedded the file from here. Continue adding rows in the same manner until you reach 10” by 10”
![]() Written instructions:
Written instructions:
R1: In a Magic circle CH3, 2DC(TC), CH3, *3DC (TC), CH3,* Repeat from * to * three times. SL into the third chain of the round.
If you are working in different colours fasten off and weave in ends in-between each row. Attach new colour to the same stitch as you ended the previous row in.
If you are more advanced use a standing stitch to replace the CH3 at the beginning of each row.
R2: CH4 (counts as one DC and CH1), *[3 DC(TC), CH3, 3DC(TC)] in the next corner CH3 space, CH1* Repeat from * to * three times in total. Join with a SL in the 3rd chain of the beginning CH4.
R3: CH3 (counts as one DC(TC)), 2DC(TC) in sameCH1 space, *CH1 [3 DC(TC), CH3, 3DC(TC)] in the corner CH3 space, CH1, 3DC (TC) in CH1 space, * Repeat from * to * three times. CH1, 3 DC(TC), CH3, 3DC(TC)] in the corner CH3 space,CH1, Join with a SL in the 3rd chain from the beginning.
R4: CH3 (counts as one DC(TC)), 2DC(TC) in sameCH1 space, *CH1 [3 DC(TC), CH3, 3DC(TC)] in the corner CH3 space, CH1, 3DC (TC) in CH1 space, CH1, 3DC (TC) in CH1 space * Repeat from * to * three times. CH1, 3 DC(TC), CH3, 3DC(TC)] in the corner CH3 space,CH1, CH1, 3DC (TC) in CH1 space Join with a SL in the 3rd chain from the beginning.
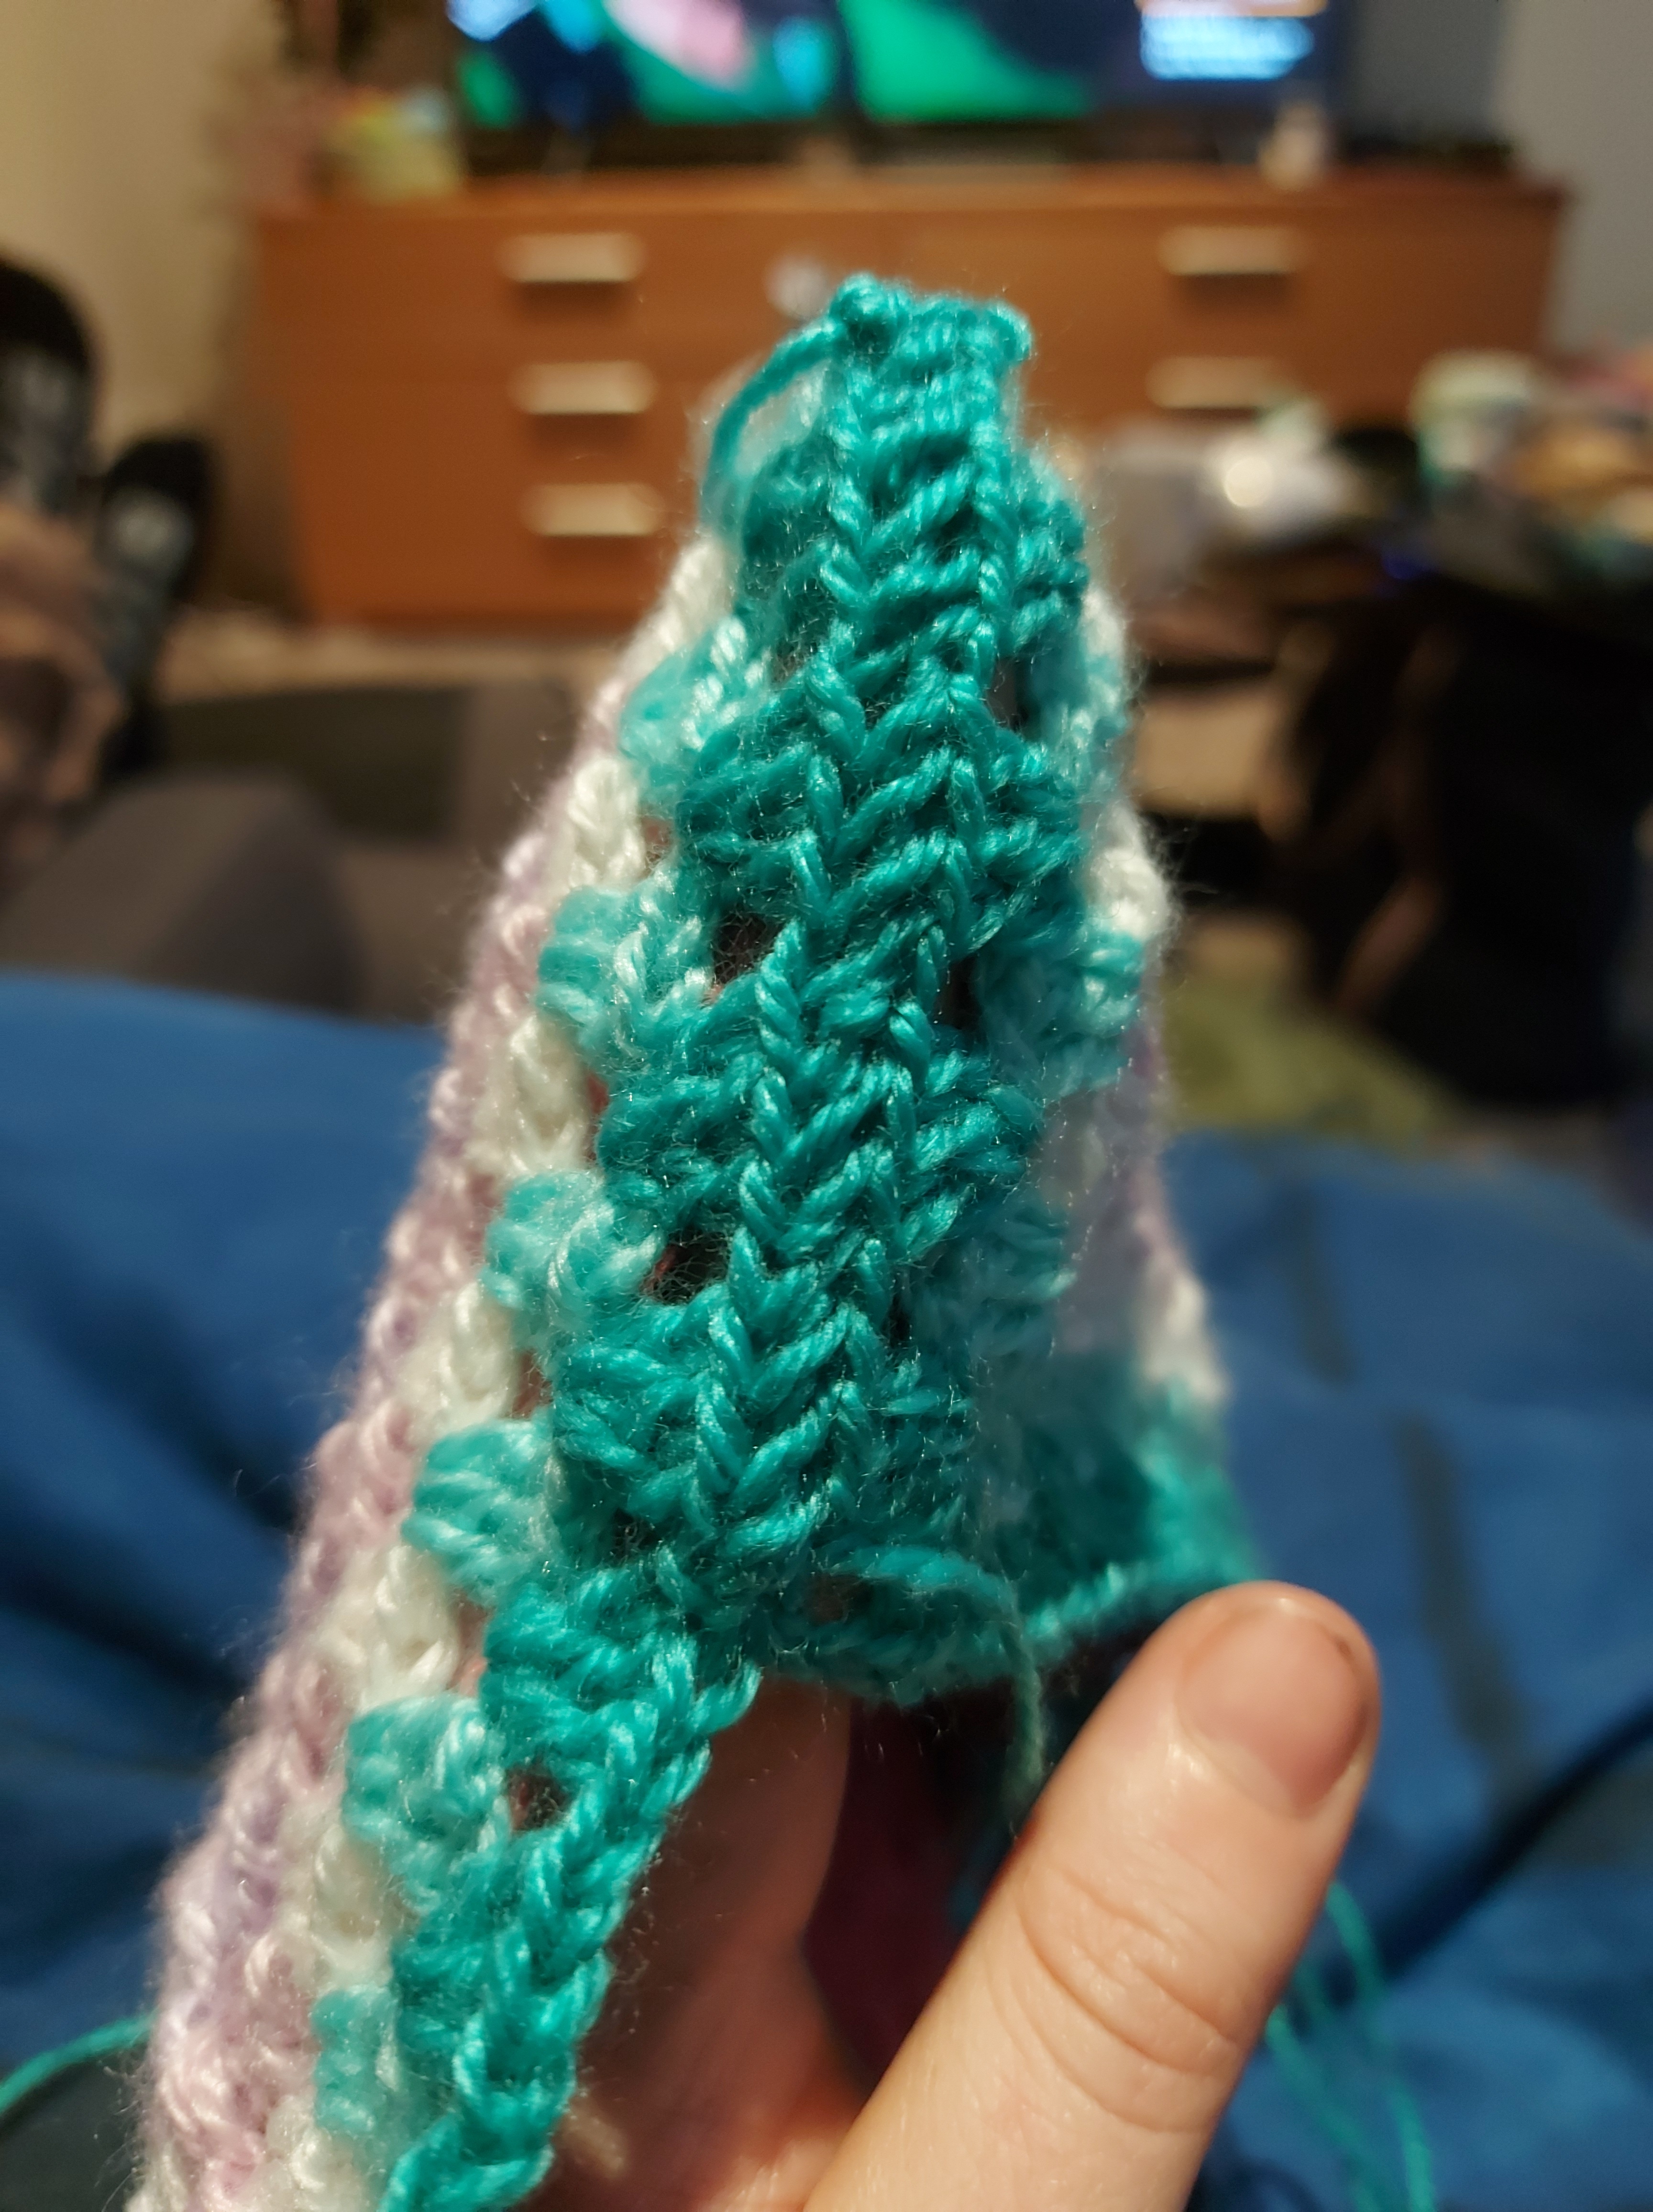
R5: Repeat R4 adding one extra *CH1, 3DC (TC) in CH1 space* in each round as the square grows.
Fasten off, Weave in ends. Block, if necessary.

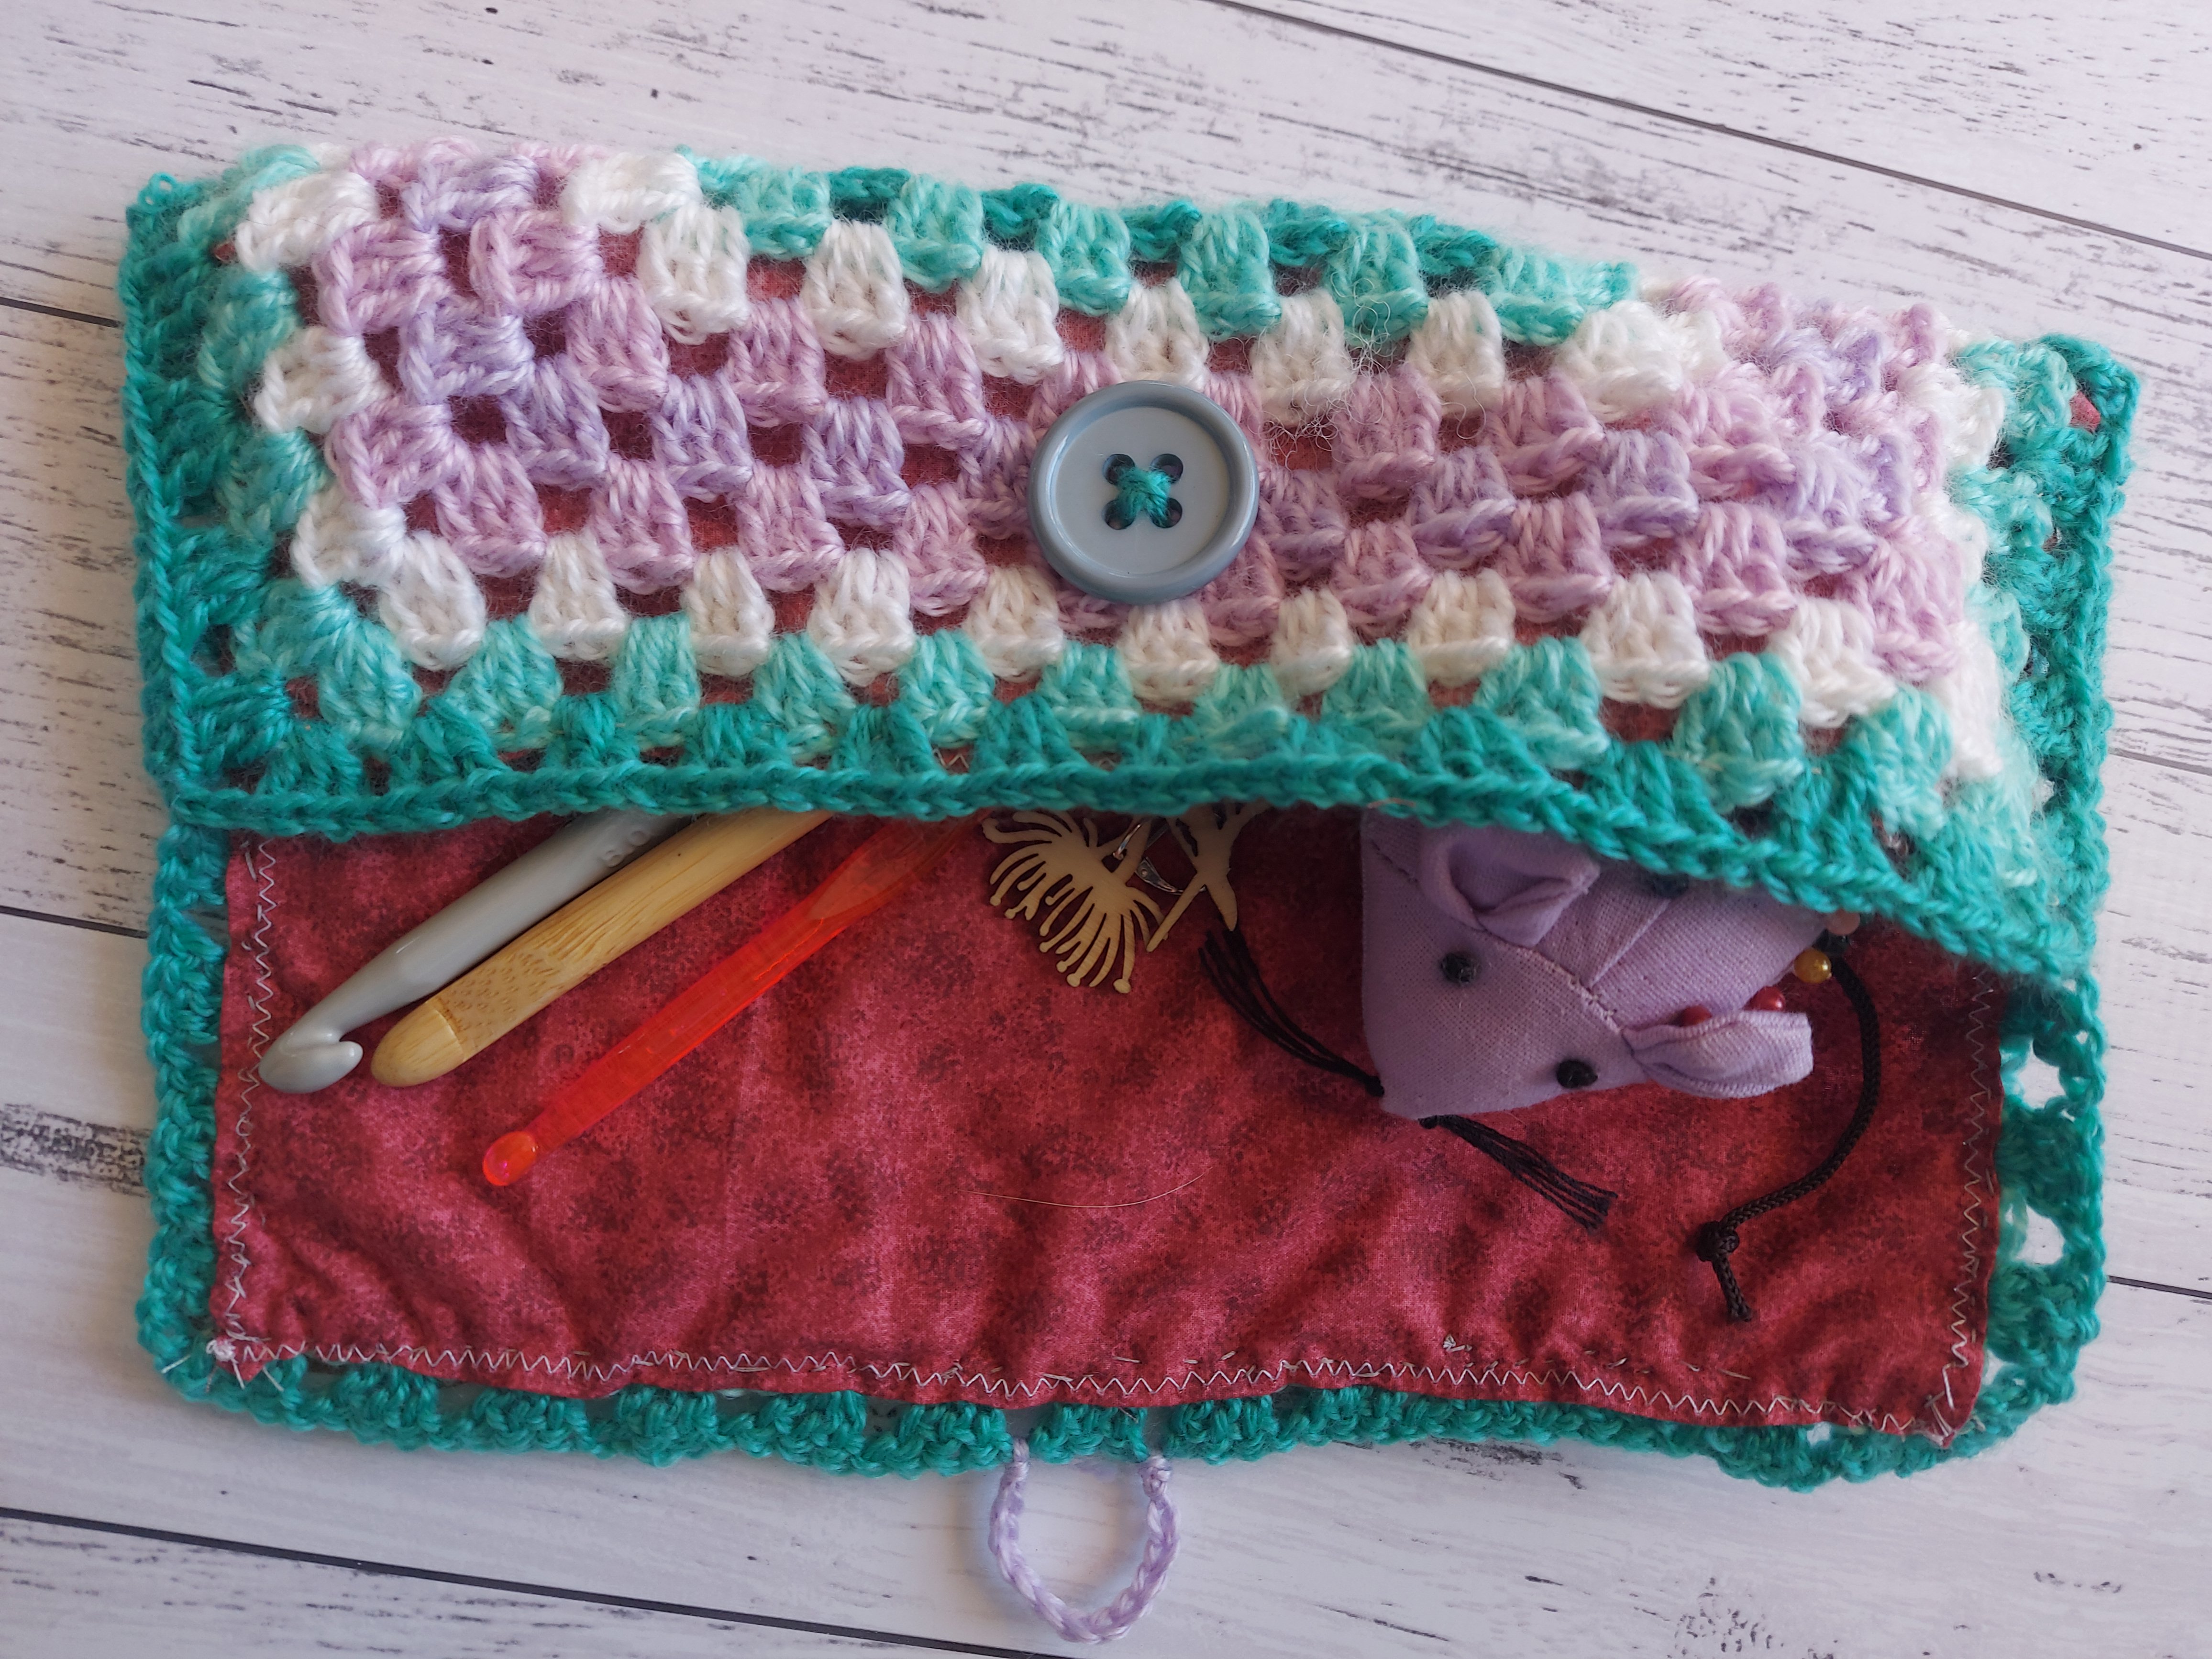
Assembling the Bag
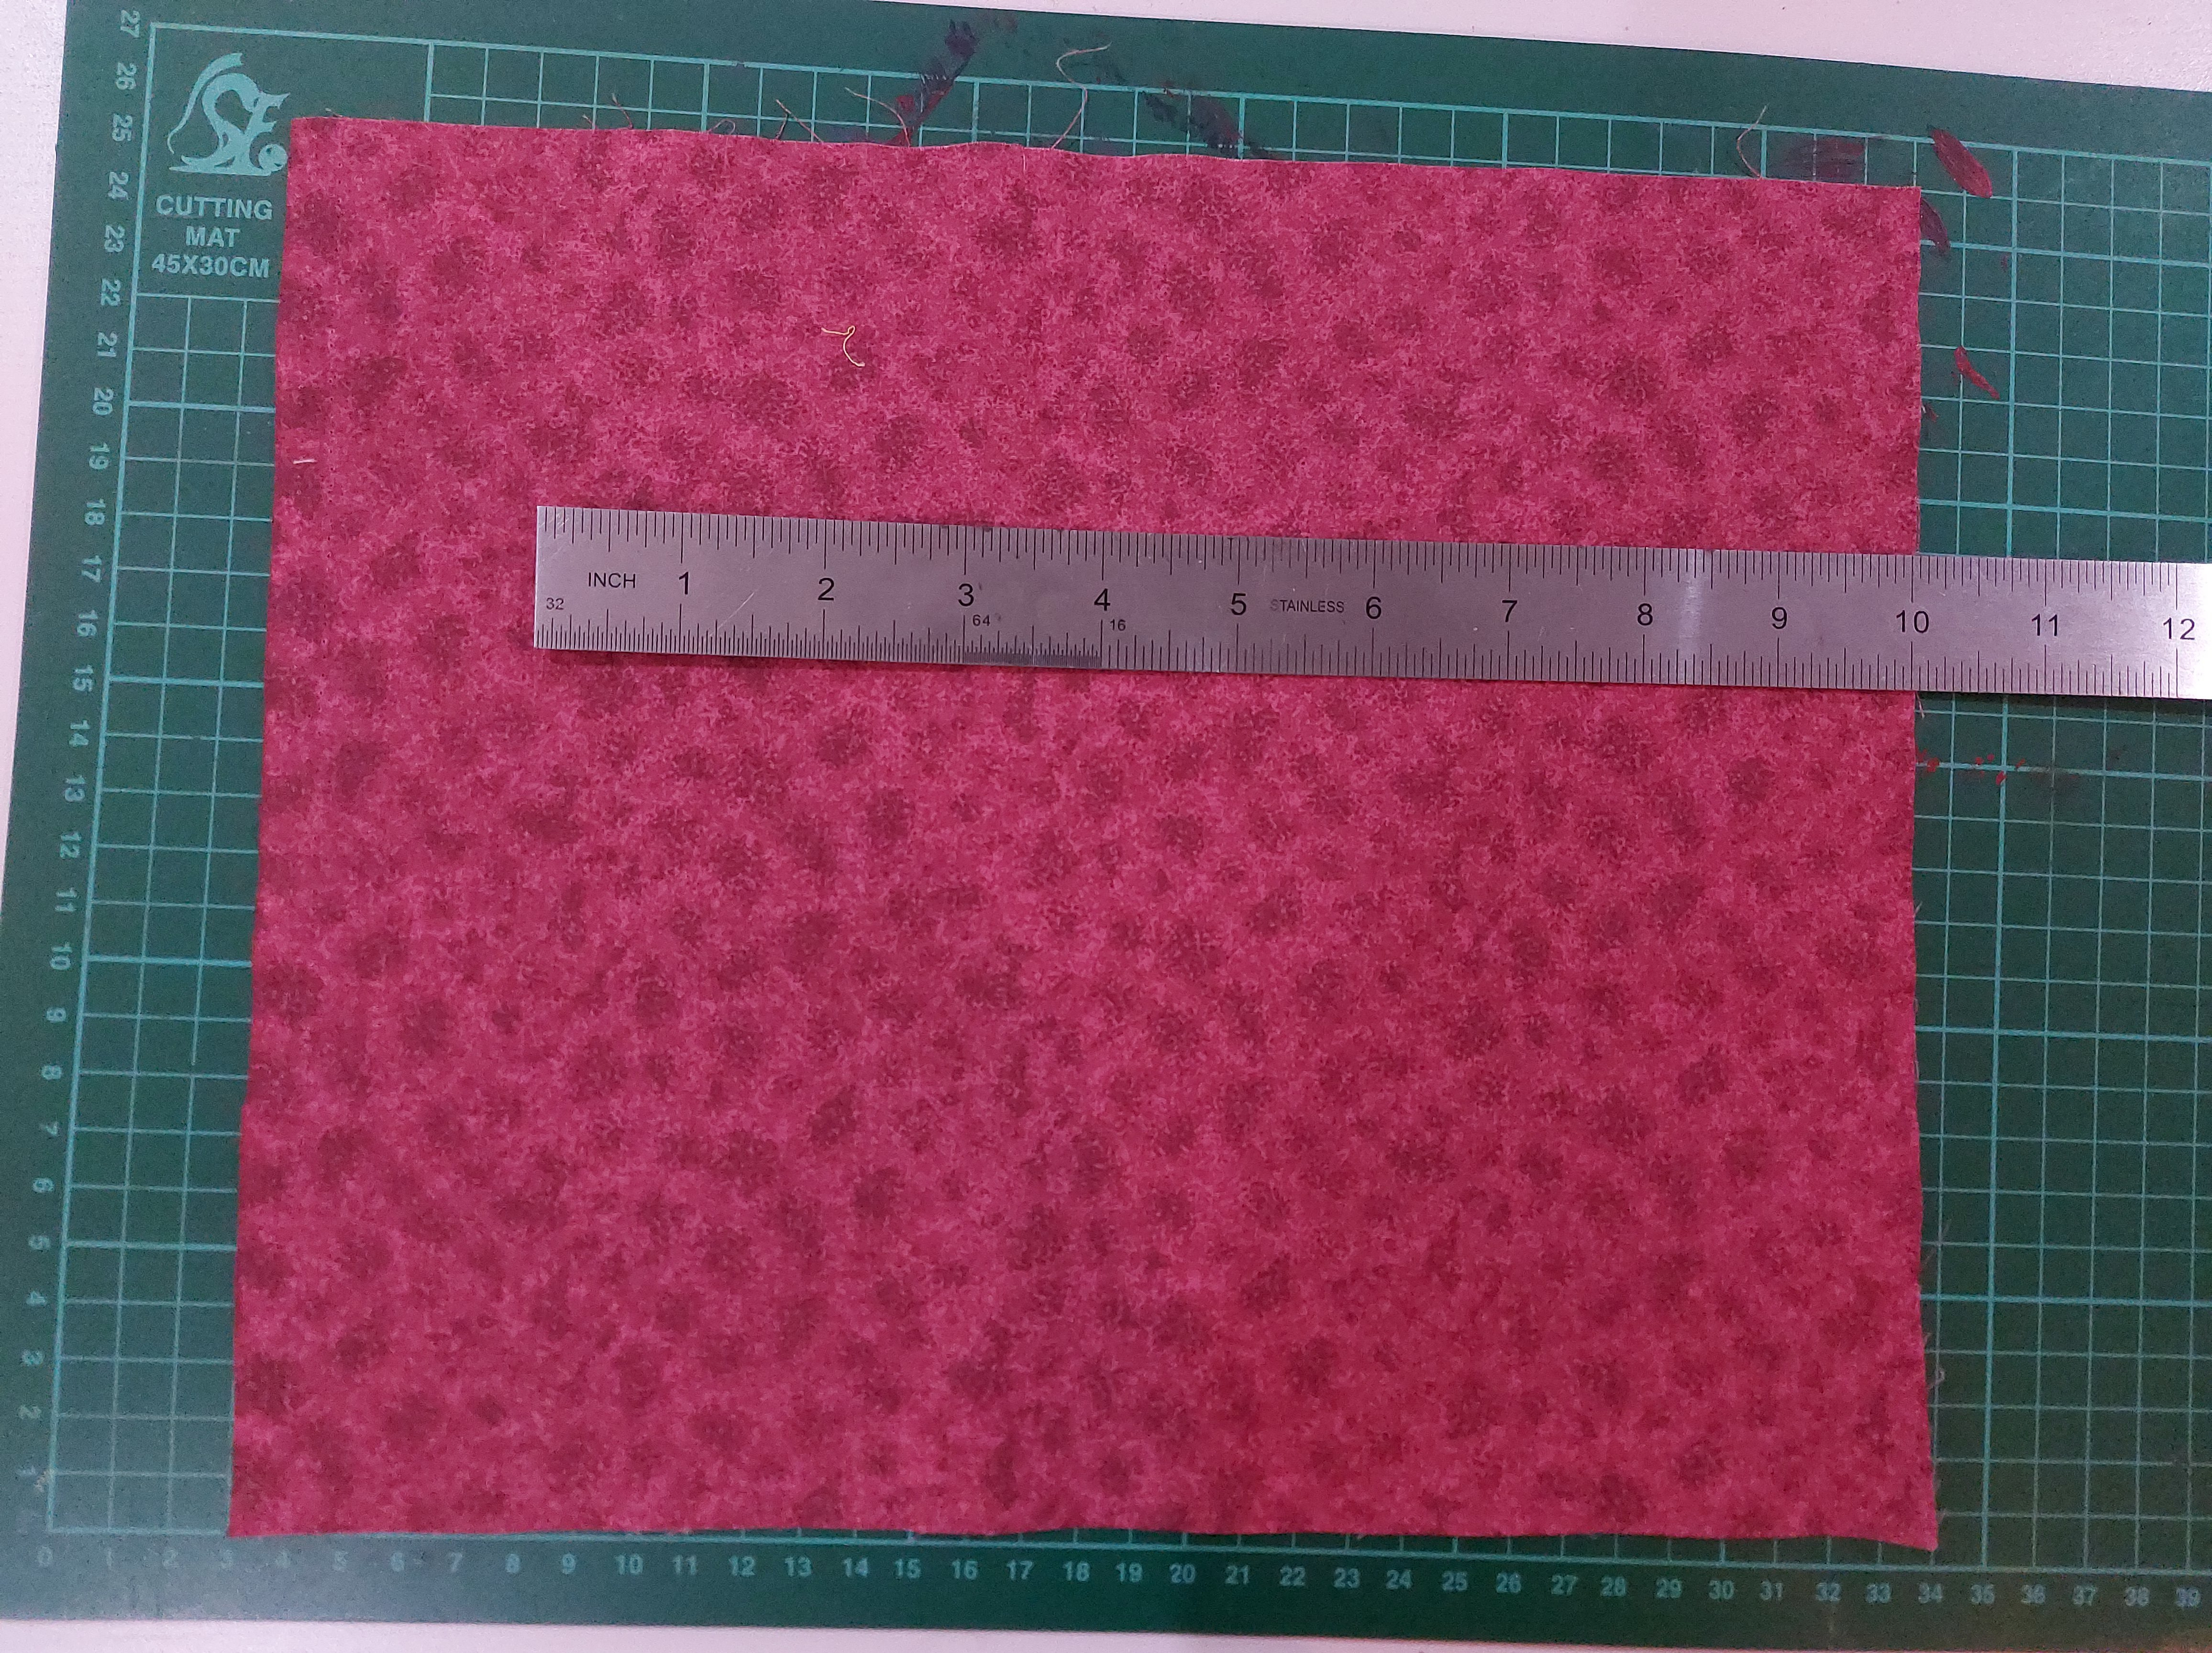
Measure the Granny Square. It should be 10” by 10”. If not you will need to scale your fabric square to be the same dimensions as your granny square.
Measure and cut the fabric to your square measurements (10”x10”). Do not leave a seam allowance.
Check that the two pieces match.

Pin a ¼” seam allowance around the square. Sew this around. This step is quicker with a sewing machine.
Place fabric, right side up onto the wrong side of your square. With a classic granny square, this will be the side that was not facing you when you made the square. Pin thoroughly.
Hand stitch the granny square onto the fabric. Work through the stitches so that your thread does not show through the granny square. This is time consuming but DO NOT use a sewing machine. It will ruin your square or stretch the stitches.

Fold the granny square into thirds. I found that a fold just greater then thirds was the best. This left 4 DC (TC) clusters for the flap. Pin together with stitch markers.
Mock the finished product by placing a button to make sure you are happy with the arrangement.
Sew the sides together. Do this by aligning the stitches and inserting the needle through both loops of each stitch. Enter one side of the seam and exit the other. Work one way only to create the nice diagonal stitches. It will be like working in loops.
Fasten off and secure ends.

Sew on button. Use yarn and fasten to the granny square.
You can choose to add two buttons if desired.
When button is attached fasten yarn to the bag flap in line with button.
CH25-30 to fit around button. SL to the flap. Fasten off and weave in ends.

Please share your work using #grannysquarenotions and #craftycommuterdesigns and @crafty_commuter I would love to see your work!


Terms of use:
Free patterns found on this site can be used to make finished items for the following purposes:
- For personal use
- As gifts for friends/family
- For charity donations
- For sale online
- For sale at craft fairs, outdoor markets, etc.
When using the free patterns found on this site, please be aware of the following:
- You are allowed sell finished items from the patterns found here. However, you may NOT, under any circumstances, use the photos found on this site for selling your items. If you are going to sell online, you should make your own items and photograph them to represent your own work.
- You may NOT copy and paste the pattern onto your own blog, Facebook, or anywhere else. If you would like to share a pattern, simply share the link to the page instead. You are welcome to copy and paste a pattern into a document for printing or saving for personal use only.
- You may NOT use the free patterns found on this site as teaching material and/or for online classes without expressed written consent from the designer/owner of this page.
- You may NOT use the free patterns found on this site to create video tutorials on YouTube or any other video platform, site, or blog.
- You may NOT post a translation of the patterns found on this site anywhere without expressed written consent from the designer/owner of this page.
- You may NOT create PDFs of the patterns found on this site, altered or in its original form, for intent to distribute to others or post on illegal pattern sharing sites. The revenue earned by ad traffic to this site is what allows for free patterns to be written and published. Without people visiting this site to view the patterns, there will be no traffic which means, no more free patterns.
- You may NOT copy any of the free patterns on this site, in part or as a whole, and claim them as your own pattern.
- You may NOT resell the free patterns found on this site, altered or in its original form.
If you have any questions regarding the terms of use of this page, please contact the designer/site owner.

One thought on “Granny Square Bag”